Ginger Bisquite

Lifestyle, DIY, Family & Food

Create a Tranquil Bedroom

March 7, 2014 by Jenni Clutten | 0 comments

We’re still in the process of adding a bit of personality to our new home.  It’s now 5 months since we moved here but still all we’ve really tackled has been the living room and the nursery.  I have our bedroom in our sights now and the main sense I want to create is a haven of peace and tranquility.

Here are some of my favourite pieces from across the net that I think create a tranquil bedroom:Create a Tranquil Bedroom

We all know that the bed is the main focal point of any bedroom, so double bed frames feature high on my wish list when it comes to creating a perfect feel.  Then next it has to be the lighting, the copper bedside lamp adds something sleek and modern.  I feel it really gives the scheme a quirky edge taking a calming scheme from dull to alluring.  The look is then completed by a beautiful set of side tables and a must have scent from Jo Malone. (All sources available by clicking on the moodboard above).
What makes you feel relaxed in the bedroom? I personally love the feel of crisp cotton and that satisfying feeling of freshly washed sheets.
Disclosure: Post written in collaboration with Carpetright, all words and opinions my own.

Willow and Hall Interview

February 28, 2014 by Jenni Clutten | 21 Comments

Willow and Hal

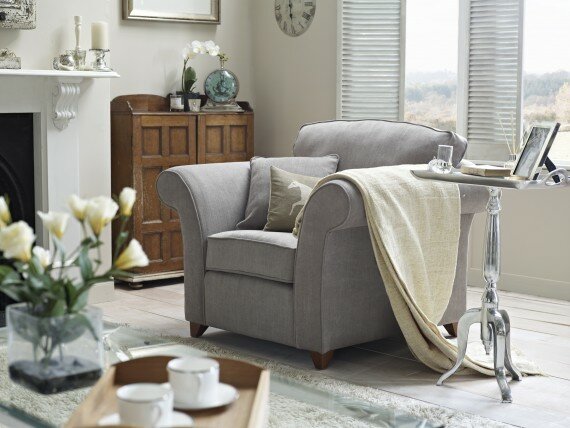
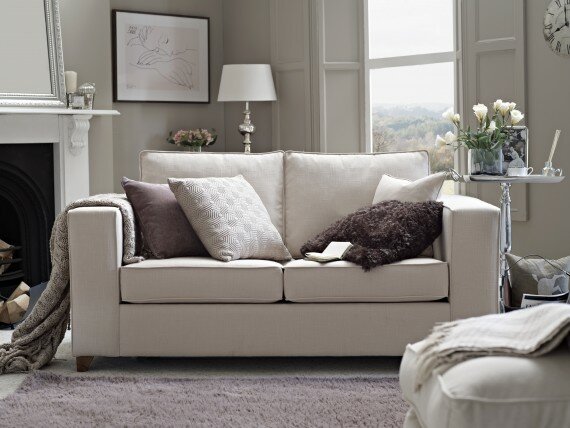
I was recently lucky enough to be given the opportunity to interview the lovely Sarah Massouh, owner of Willow and Hall.  I had been aware of their wonderful sofas and sofa beds for a little while due to the post on Tigerlillyquinn’s blog and I loved the designs instantly.  At the time I hadn’t realised that their products are made in the UK and that their sofa beds also include a wonderfully luxurious mattress (with an affordable price tag.)

Want to know more? Carry on reading to get the full low down on Willow and Hall including which 5 products Sarah has in her own home.  (A true sign of believing in your brand I hope you’ll agree.)
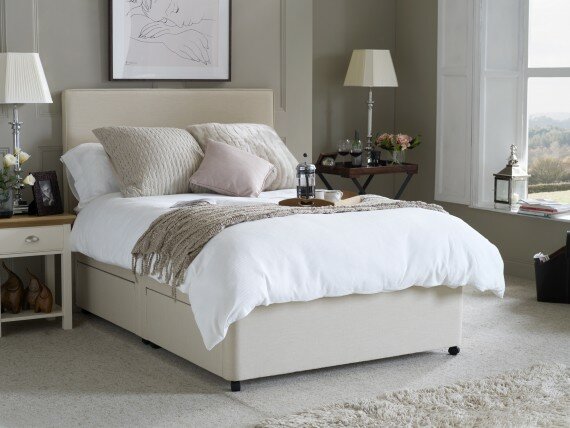
bed_1_2_ langridge_chair_dressed wilton_head_on_cush_2

Q: What made you want to start Willow and Hall?
A: My passion for British furniture/interior design and my frustration with the lack of availability of high quality British furniture at more affordable prices resulted in me setting up Willow and Hall in 2012.  The creation of the business and what is still central to everything we do today is to design British furniture which looks beautiful and is stylish whilst also being really high quality and comfy. I wanted to provide all of this for our customers at fantastic value and combined with a high quality and personal service.

Q: In a crowded market place, what do you think makes Willow and Hall unique?
A: We believe the success to date of Willow and Hall is down to a number of factors: Firstly we are able to offer our furniture at much lower prices than the high street and even our online competitors as we focus entirely on the products removing the need to pass on other costs to customers such as shops and warehousing costs. We are also able to offer our customers a custom range of options (they can choose from over 70 fabrics and leathers; choose their seat fillings; and the sofa beds all come with a choice of three different mattresses); delivery is speedy (3-4 weeks for all items); the materials are of very high quality (all hand-picked ourselves); and a fantastic amount of British craftsmanship goes into every single item. All this is combined with a passion for providing excellent customer service (we’ve just been awarded a Gold Trusted Merchant award by the independent feedback service FEEFO).

Q Which products do you have in your own home?
A: I have five products in my home – I can’t squeeze any more in with our older furniture at present! We have a sofa bed in our living room (the Elmley) for when our family and friends come to stay as we are a very sociable family so wanted a super comfy sleeping option without compromising on the style and comfort. We then have an Apply 1 seater in the corner of our study. This gets used more as a sofa for people to come in and sit on and have a natter when I am working too late but it is also nice to know it can be pulled out into a bed if we should need it. Finally all three of our beds in our bedrooms have our mattresses. They are quite simply the most comfortable mattresses my husband and I have ever slept on – guests say the same too. I could not imagine having any other mattresses in our house. I can’t wait to bring our bed range out so that more customers will be compelled to purchase these beautiful mattresses.

41 2

Q: What influences your product designs?
A: It’s absolutely about designing furniture which looks beautiful and is stylish whilst also being really high quality and comfy. Once we’ve achieved this we work extremely hard to make sure all the smaller details are just right for that particular model from the feet shape to the piping and zips. All the “ingredients” must always be of the highest quality and used in the right way by incredibly skilled craftsmen in Wiltshire.

Q: Which designs and fabrics would you recommend for young families?
A: Firstly I would advise families to carefully consider how they will be using the room the furniture is going in. Young families are often very busy and require multiple uses for rooms such as using a living room as a TV room, play room and social space. I would therefore recommend that they pick a design which size does not over-power the room/ fits neatly into the space taking into account its uses. A sofa should always fit around a family and their lifestyle not the other way around.  

Secondly, I would recommend picking a fairly neutral fabric so that it fits with changing family decors but that is not too light so that it shows up a multitude of sins which are inevitable with a young family. Greys are a good choice as they are still relatively neutral yet dark enough to not show up every mark. Other fabrics which work well are patterned/ striped fabrics or two-toned fabrics such as out Textured Linen. You can always add further colour/ lighter colours through cushions and throws – a far safer way to bring these colours into your furniture. Also consider the functionality of the fabric – this is just as key as aesthetics here. Find out what the rub counts and cleaning instructions are for the fabrics to get an idea of their durability and practicality. As a rule, synthetic fabrics are more durable, colourfast and cleanable. Tightly woven fabrics and fabrics that are heavy will stand up to wear and tear better, as will leather.
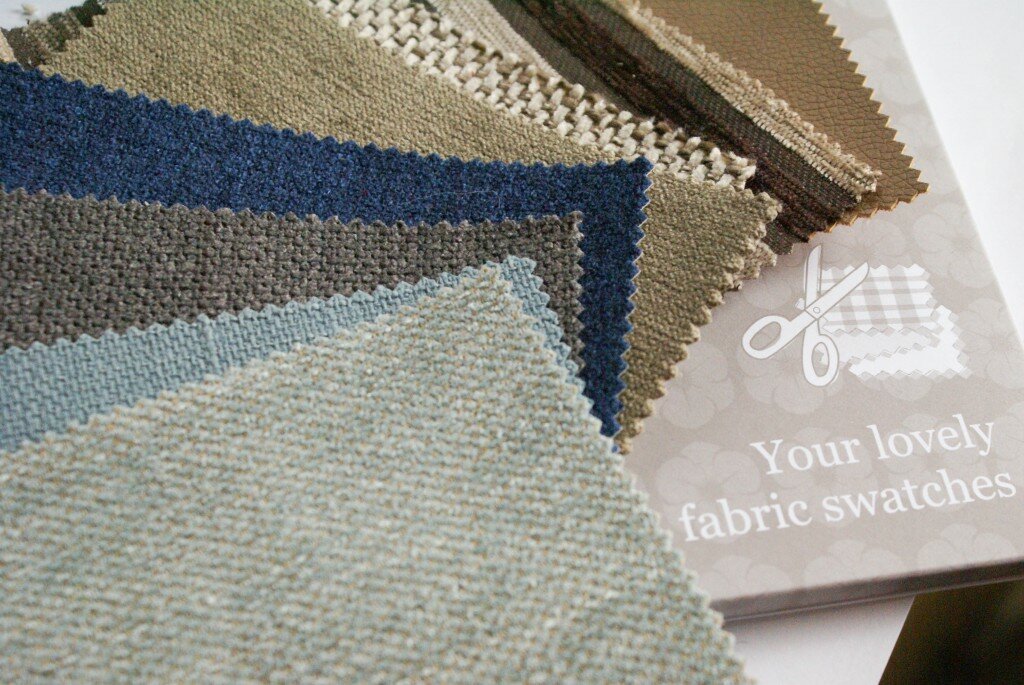
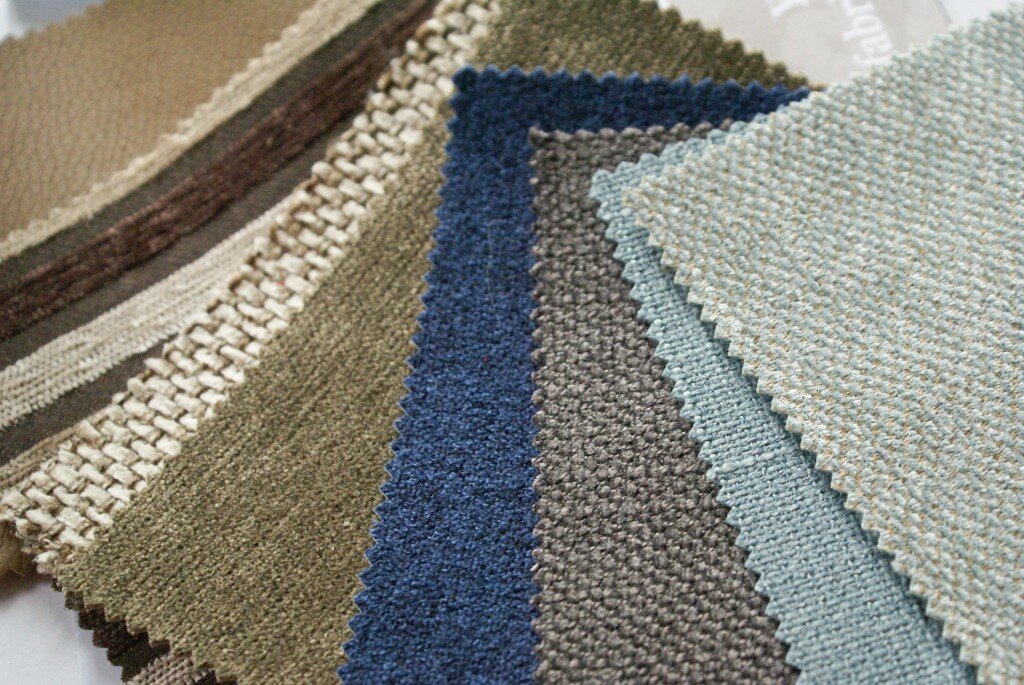
Willow and Hall SwatchesWillow and Hall Swatches Willow and Hall Swatches

Q: Would you like to expand the business into other areas?
A: Absolutely! We want to be able to offer great quality and affordable British furniture to even more customers and to more parts of their homes. With this in mind we will be introducing new sofa/ sofa bed 2 and 3 seater designs as well as some stunning new sofa/ sofa bed corner units in March this year. We will also be introducing a beautiful range of footstools and blanket boxes to perfectly complement our furniture in early Summer as well as a completely new bed range to accompany our hand-made bed mattresses.

Q: I understand you’re opening a show room in Surrey, what made you want to branch out from the online world?
A: The opening of our first showroom will give customers the chance to view our lovely products before they purchase without us having to compromise on the value we offer. We believe this provides our customers with an even better service over and above our 100% free returns policy that we currently offer. We will never open up shops or a large range of showrooms as we don’t want to pass these costs onto our customers however opening up one showroom does give this option to those nervous to purchase entirely online.

——————————————————————————————————————————————————————————–

So a big thank you to Sarah for taking the time to answer my questions so thoroughly, I thought her ideas on family friendly options were especially useful and I can’t wait to head to the showroom for a nose.  My personal favourite is the rather stunning Dunsmore Sofa Bed which I’ve been showing my husband suggestively all day.  I think it would make a gorgeous addition to a nautical themed living room or an art deco bedroom and the leather makes it very practical and long lasting.
Willow and Hall

Disclosure: Post written in collaboration with Willow and Hall, all words and opinions my own unless otherwise stated.

Scrapstore Finds

February 12, 2014 by Jenni Clutten | 23 Comments

scrapstoreIt’s no secret that I love to re-use and recycle and when I found out about Scrapstore I was itching to get into the nearest one to have a mooch about for some crafty items.

Scrapstores give you the chance to find art and craft materials at a fraction of the price you could find them anywhere else.

Some scrapstores are only open to schools and voluntary organisations but others open their doors to everyone.

All scrapstores have different means of accessing their scrap materials. In some you need to pay an individual membership fee, at others you simply pay for the scrap you take on the day.

Many scrapstores also have shops open to the public selling high quality art and craft materials from glue to paintbrushes to complement the scrap.”

Since we joined our local branch over the Summer we’ve already been several times, picking up scraps of unwanted paper, sticky silver tape, empty sweet jars and numerous other indescribable objects.  As a member we had to pay a £30 yearly individual membership fee which means we can pick up as much Scrapstore bits and pieces as we want.  There are Scrapstores all over the country, and you never know quite what you are going to find, but with a bit of imagination you can create some amazing things.  

Scrapstore Finds

Our local one always has loads of unwanted childrens toys and books, I particularly love the books as they are often ones I remember from my childhood.  Inside the Scrapstore there is also a Community Repaint Scheme and a Furniture Project.

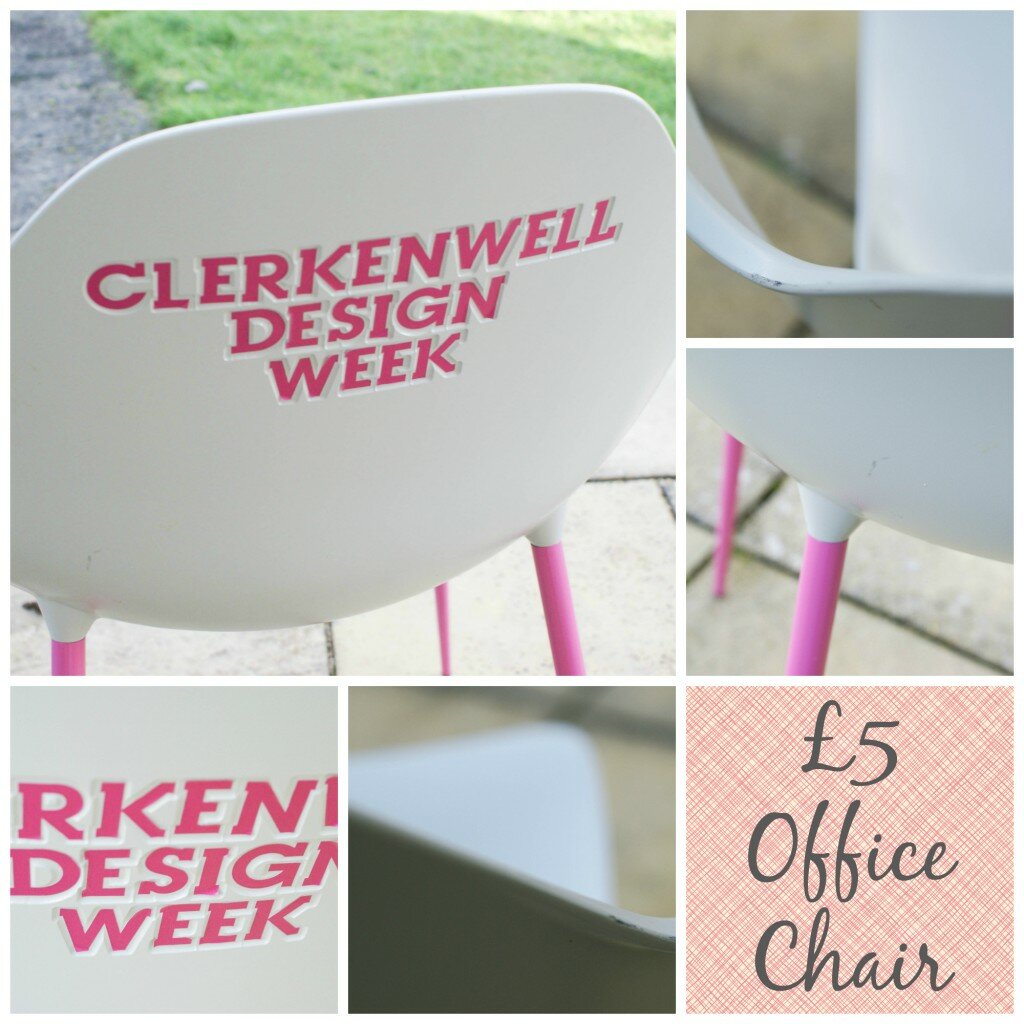
Last week I picked up a small car mat, which you can see in the top picture.  Nye has really enjoyed playing with it since I brought it home and I can see him using it for years.  And, as soon as he outgrows it I know I can give it away for another child to make use of.  The other two items I’ve shown below I purchased, but I think you’ll agree that £5 for this stylish chair and £2.50 for two and half litres of unused and unopened masonry paint is a pretty good deal!

paint. Collage

There are scrapstores all over the country and you can find your nearest one on the Reuseful website.

Choosing Statement Mirrors

January 31, 2014 by Jenni Clutten | 18 Comments

mirror

Selecting a mirror can be an easy and affordable way of updating any room, personalising a previously boring space.  I think mirrors create a homely and light feeling which is especially useful during these dark days.

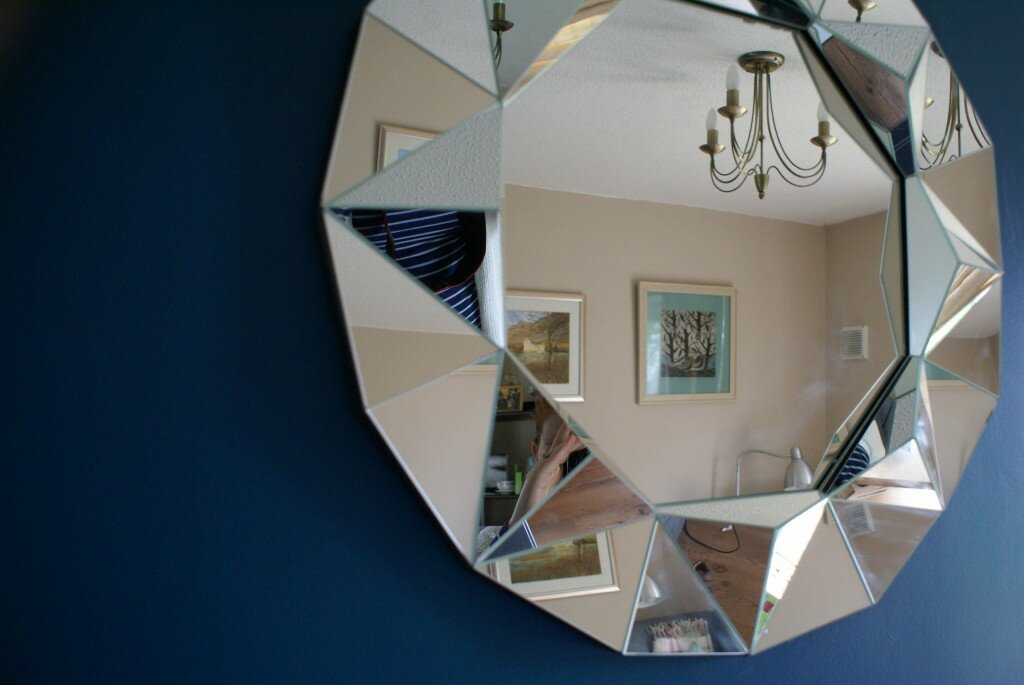
I was recently contacted by Argos and asked if I would like a mirror to review and jumped at the chance.  I selected the Living Faceted Round Wall Mirror as I have been admiring this angular style for some time.  I was pleasantly surprised to see how affordable their range of mirrors was and this one had particularly good reviews.  Now I have it I can see why, as it certainly creates a real designer look in our living room.

When choosing mirrors it is important to consider the style and size.  A large statement mirror can really draw attention so it’s important to think about where to locate it to show it off to its best potential.  You can either choose something that complements the rest of your decor or select a new style using the mirror as inspiration for your new design.

I chose to use this mirror as the starting point for a new living room design and it has encouraged me to be bold and create a feature fireplace.  To do this I selected a bold teal paint to use behind the mirror creating a fantastic contrast against the lines of the mirror.  I can’t tell you what a difference having such a statement piece has made, it’s really brought the whole room together with just a quick lick of paint and a few screws.

This is the first project we have tackled in the living areas of the house since we moved in and has really spurred me to carry on with some other small makeovers in each room to make it feel a little more like our space.  Stay tuned for more updates!

DISCLOSURE:
Post in Collaboration with Argos, but all opinions are my own.

Teal Bedroom Ideas

December 30, 2013 by Jenni Clutten | 15 Comments

The Teal Bedroom
The Teal Bedroom sources
My wonderful friends Ally and Ben recently bought a house and have been painstakingly renovating it from top to toe.  I’m talking moving doorways replumbing, knocking down walls and installing central heating amongst many many other things.  As things near an end,  it’s time to start thinking about how to finish off the rooms to turn this house into a home. starting with some teal bedroom ideas. 

DESIGN BRIEF:
Magnolia Walls
Teal Feature Wall
Ikea Pax wardrobes
Maroon Bedding
Oak Bed


MY DESIGN:
Ally wanted to use some of the items they already had and had been given (the bed, the magnolia paint, maroon bed linen and the wardrobes)  She then decided she wanted to add a bid of colour with a teal feature wall and I have used this brief to design the above mood board).

With this colour scheme I think you have two choices, to carry on with the sharp zingy modern feel or choose some more calming tones.  I’ve highlighted this with two options of alternative bed linen, one more modern design from Ikea and an alternative more neutral set from Dunelm Mill.  I also think this teal design will go well with their already owned maroon set, and if Ally decides to keep their old stuff (house renovation is an expensive business), by simply adding a few maroon trinkets this will pull everything together.

With the thrifty theme in mind, I was also thinking about a few low cost pieces of art that would really personalise the room.  As Ally has a geography degree and is currently training as a geography teacher I love the idea of creating something to hang using maps.   I love the options below and all only require a frame (easily picked up from a charity shop, car boot or IKEA) and items you would have in the cupboard at home.

map art diy

Mid Century Dining Room – Stylish Sunday

November 17, 2013 by Jenni Clutten | 4 Comments

So now the nursery is finished and off my radar I have moved my attentions towards the kitchen / dining room and Neil and I have decided that we would like to go for a mid century style.  Our new house has a lovely big kitchen dining room that is furnished in a inoffensive neutral way.  It was a shame to move out of a house where we have designed every inch of the kitchen but this one is far bigger and feels somehow more grown up.  Of course there are things I would love to change but at the moment we are trying to personalise it decoratively rather than splashing out on new tiles, kitchen doors.

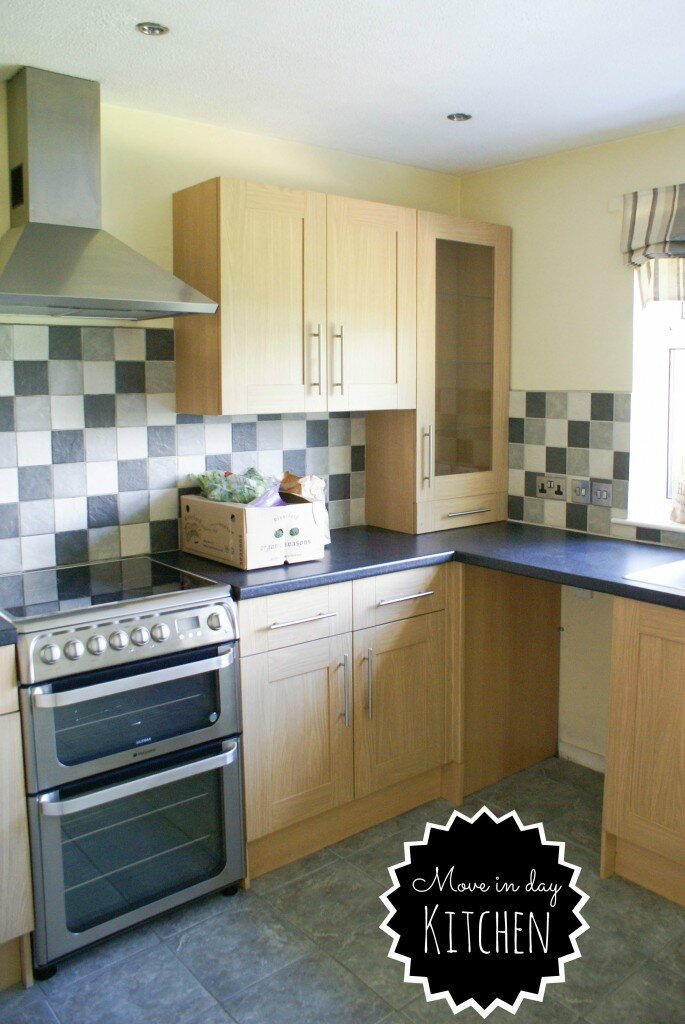
Here is the a picture of the kitchen as it was on the day we got the keys.  I failed to take a picture of the other side of the kitchen (on the right hand side of the picture).  It is purely an empty space with a cream wall and grey floor tiles just the same at the kitchen.

Kitchen Before

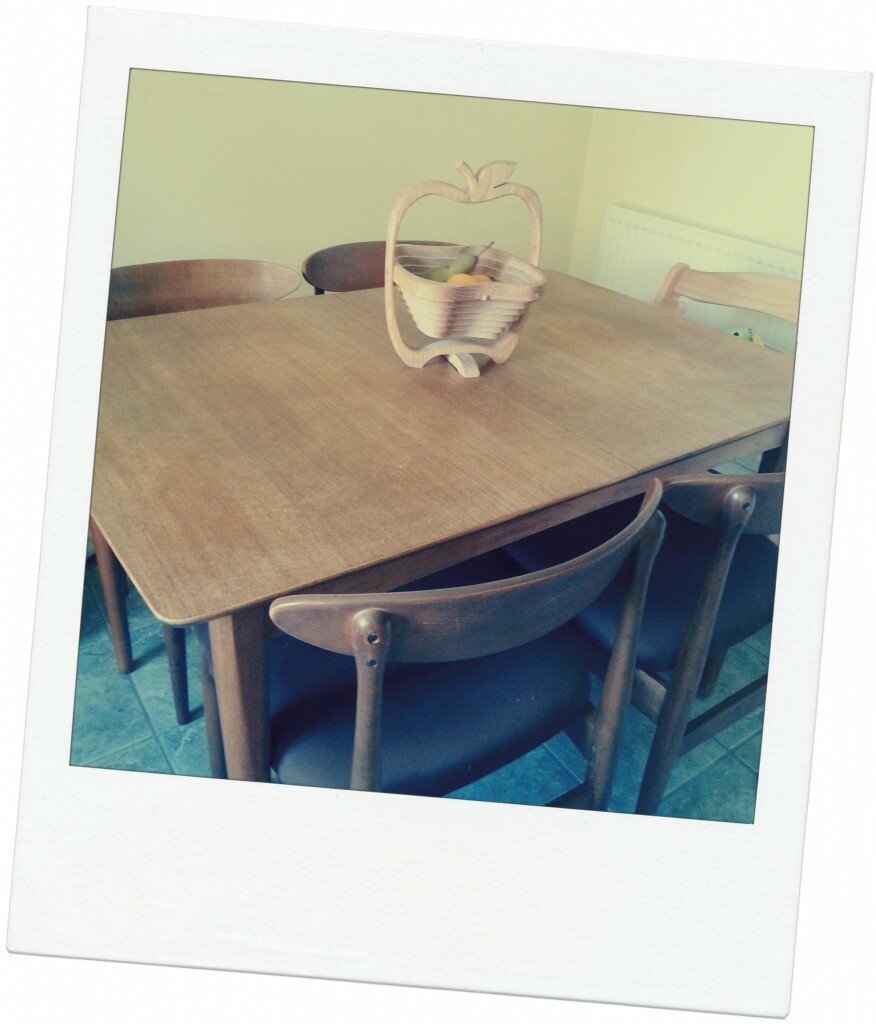
We started thinking about how we wanted the room to look when we realised that our previous kitchen table and chairs were too big (and getting a bit rickety) i.e we lost a screw from one of the legs…  When I eventually gave in to the idea of a new table and chairs we immediately agreed that we would love a mid century dining room.  I was quite surprised that we agreed so quickly on the style we would like, especially as it is dramatically different from our previous country kitchen look.  The good thing is, I knew that we would be able to get a lovely solid table and chairs for a reasonable price either on Ebay or at an auction house.

Mid Century Dining Room

In the end we won a lovely extendable teak table and 4 chairs on Ebay for less than £30 and I used the wonderful Shiply courier service to get them here. All together it came in under £100 which I don’t think is too bad for a set of solid and stylish table and chairs.  When I put my moodboard together on Polyvore I tried to find something similar to show the kind of look we were going for and the table alone is over £1000!  So after we got the table we found some Marimekko kippis wallpaper on ebay for £30 and I’ve designed everything around that for now.  We’re still deciding on the colours but I think I good lick of bright white paint will be a good starting point and a marked improvement on the lovely shade of cream we’re currently living with.

Mid Century Dining

The first job we have to do is to recover the cushions on the dining chairs as they are far from Nye proof.  I am planning to cover them in a child proof vinyl, but still on the search for something that compliments the wallpaper.  So far these geometric triangles are my favourite but I haven’t committed to it just yet.  There are loads of tutorials for recovering dining chairs with vinyl online.  I’ve pinned lots for inspiration on my Board as well as lots of other nick nacks and gorgeous style inspiration.

What do you think of the look so far?  Got any dining room renovation plans of your own?

Creating a peaceful nursery – stylish sunday

September 29, 2013 by Jenni Clutten | 2 Comments

Our house buying is almost complete and now it is time to think about creating a peaceful nursery for our new arrival.

I love vibrant colours, which is why I painted the nursery in our last house a wonderful bright yellow.  This time around, with one child already and my due date looming in November, I’m seeking out a more peaceful vibe to try and calm my new baby nerves.  I love the idea of white walls but I actually think they can sometimes feel a bit stark and bright, by adding a little colour this should help soften up the room.

Taking Inspiration:
I was inspired by some other nurseries I noticed on this morning so I’ve made a collection of my favourite UK paint samples and style ideas on the polyvore board below.  I’ve also included the vinyl decals I bought this afternoon on ebay which I’ll be adding to the turquoise wall to give it a more fun look.  I used quite  a large vinyl decal of a tree in Nye’s old room and have heard good things about smaller ones so I’m looking forward to give it a go.  Although I love wallpaper, the cost of it soon adds up, even in a small room so I’m hoping these clouds will be a good alternative. (I’ve got to admit, I fell in love with them a little bit here.)

mint moodboard inspiration

Then once I had chosen my colour and feel I decided to put together a few of the items we already own with a few new things too.  I bought the amazing felt lampshade from Modernbaby in the sale for £6.  I probably do have a spare shade nocking around but I thought this one was too cute to pass up.  The cot bed is just an example though (although a very reasonable £99 from John Lewis) as we are reusing Nye’s old cotbed which we sourced via freecycle.

Peaceful Nursery

Selecting complementing products
I really think the nursery above has a traditional yet modern feel.  The mint colour could easily look babyish but I think the use of monochrome really makes it feel a bit more unique.  I know it’s quite blue-ish but I actually see it as a really girly room.  That said, I still think it would look awesome for a baby boy.
Creating a sense of peace
Thinking back to when Nye was a newborn we were very lucky to be sent some amazing gifts and I was particularly grateful for a fantastic room fragrance.  It really helped me to enjoy those evening feeds.  I have no idea if it helped Nye to have any kind of understanding of night time but I enjoyed it, and as they say, contented mum means contented baby!

Getting the right lighting can also be helpful when creating a peaceful nursery.  I recently took a punt on a Cloud B Tranquil Turtle which I found in the Zulily sale for £20 which we love. (Zulily only sell items for limited periods so I have linked to the amazon listing)  The turtle acts as a fantastic nightlight and gives out a mesmerising blue wave effect that moves like waves across the walls and ceiling.  There are loads of settings, moving waves or static as well as two different sound affects, waves and waves with calming music.  It’s a great addition to any room and I think Neil is debating getting one for our bedroom we find it so relaxing.  So, for setting a bed time routine for a baby I think this will be awesome.

DISCLOSURE
This is not a sponsored post, I have selected all the items in the post myself and purchased, love and use many of them already.

DIY Children’s Tent – UK Version

June 27, 2013 by Jenni Clutten | 3 Comments

Nye is now 18 months old, and I have been wanting to find some more creative activities that will provide opportunities for imaginative play.  Den’s are an excellent example of toys that can be used for multiple purposes, inside and outside and will last and be enjoyed for years.  I still remember being addicted to making dens in our house as a child so this months Center Parcs June Challenge was the perfect push I needed to create our very own DIY Children’s Tent.

DIY Children's TentI remembered immediately that I had pinned a DIY A Frame Tent on some time ago and sought immediately to track it down on one of my numerous boards.  I eventually found it, wrote down all the measurements and headed out to look for some suitable material in local charity shop and DIY store.  However, it soon became apparent that I wouldn’t be able to find the exact measurements as the widths of wood in the UK are different to America (mm here and inches there.)

So, with that in mind I thought it might be helpful to share the measurements I used so that the DIY is a little easier for people this side of the pond.  I also took the advice of  Rubyellen who suggests that you could use a single bed cover instead of fabric.  For me this meant the cover was double sided (fishes on the inside and out) and also that I did not have to hem the fabric. (Hurrah) I was also feeling extra cheeky as I had no elastic to sew to the cover and managed to clip the edges of the fabric to the frame using elastic bands and string.  But, having used this for a few days, I think sewing on the elastic will mean I don’t have to keep tying the edges down every 24 hours.

YOU WILL NEED

For the Tent Cover

  • 1 x single duvet cover (135mm x 200m) – you could also use fabric cut to any size you would like and just alter the length of the wood to accommodate.
  • 1 meter of elastic
  • Scissors
  • 4 x Elastic Bands

For The Frame

  • 2 x 18 x44mm x 2.4m
  • 1 x 18mm x 2.4 dowel rod
  • Drill
  • 18mm or 19mm flat wood drill bit (I used 19mm because that’s the closest we had to 18mm)
  • Hand saw
  • Tape Measure
  • Pencil
  • String

First of all I must say the instructions on the original A-Frame blog post are really clear and include pictures that are incredibly helpful.  I am going to write a quick run down of what I did, just because I did make a few alterations to try and make the whole process a bit quicker.  But if you get stuck, please click on the link and the photos there will help you!

  1. Start by using the hand saw to cut the 2 x 2.4m wood lengths in half.  Once this is done you will have 4 x 1.2m lengths which will make the A frame.
  2. Next use a hand saw to cut the circular dowel that creates the top of the tent.  I cut mine to 147cm.
    I calculated this length by using the width of the fabric (135cm) and then adding 6cm on to each end (135 + 6 + 6) = 147cm.  This then allows for the a frame to be added on to the end with a little room keep it all together.
  3. We then measured up to drill the holes in the 4 x A frame.  To do this I used a tape measure to mark 15cm down from the top of each leg the marked a cross in the centre of the wood (22mm) which showed where the drill bit needed to go.
  4. Once each leg was measured up we used a 19mm drill bit to create a hole for the top dowel of the tent to be inserted.
  5. Next I inserted the dowel into the four holes to create the basic frame of the tent and stood it up ready for its finishing touches.
  6. Once the frame has been created you can then hang the fabric over it and line up the legs at each end.
  7. As I was unable to find a 18mm drill bit and used a 19mm one instead,  I then used some string to secure the legs into place.
  8. Finally once I was happy with how the cover was hanging, I used an elastic band on the bottom of each leg to secure the four corners of the fabric.  For good measure I then tied some string around to keep them as tight as possible. (You could sew some elastic directly on to the fabric to make for a more hard wearing tent)
  9. Enjoy your new DIY Children’s Tent by adding some cushions and blankets!

I am writing this post in my capacity as a Center Parcs family blogger.  For a chance to become a Center Parcs Family Blogger and to win a family break to a Center Parcs village of your choice, simply share pictures of your outside hideout on your blog, letting Tots 100 and Center Parcs know that it’s your entry into this month’s challenge. Then just tweet us a link to it – be sure to include the Center Parcs and Tots 100 handles in your tweet, and don’t forget to use the #CPFamilyBreaks hashtag before the challenge closes on June 28th.

This gallery contains 0 photos