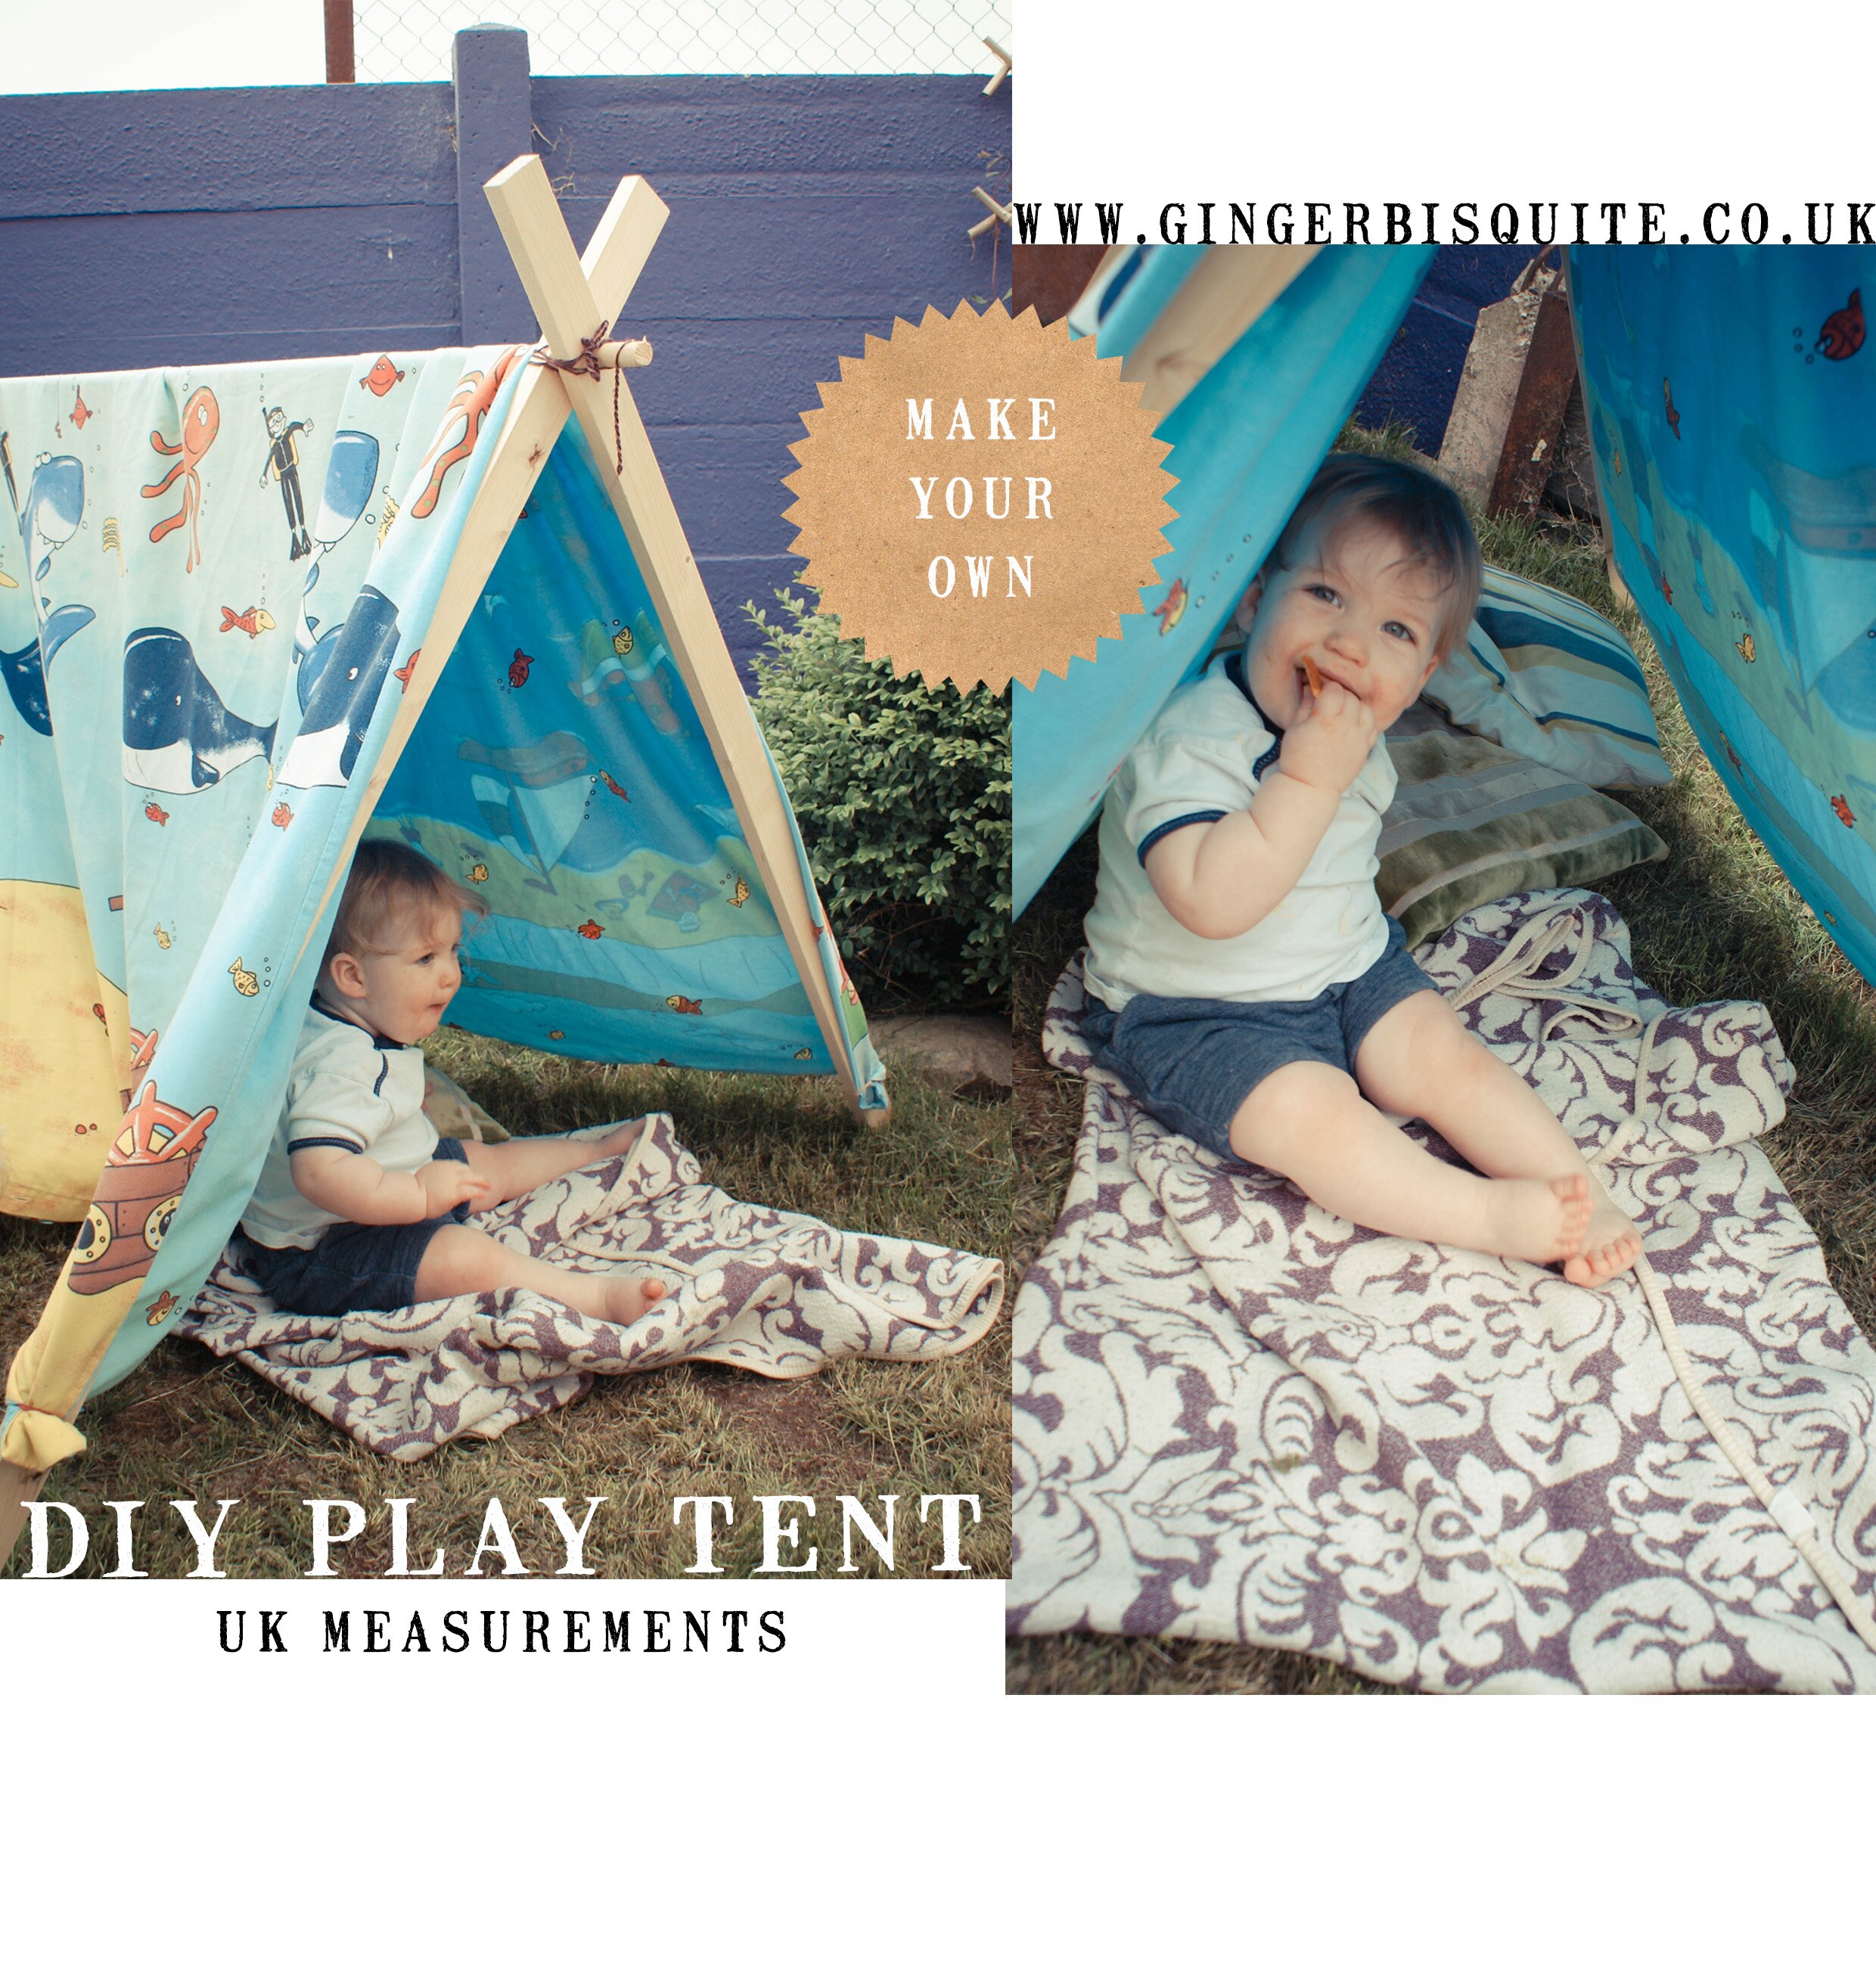
Ginger Bisquite

Lifestyle, DIY, Family & Food

Scrapstore Finds

February 12, 2014 by Jenni Clutten | 23 Comments

scrapstoreIt’s no secret that I love to re-use and recycle and when I found out about Scrapstore I was itching to get into the nearest one to have a mooch about for some crafty items.

Scrapstores give you the chance to find art and craft materials at a fraction of the price you could find them anywhere else.

Some scrapstores are only open to schools and voluntary organisations but others open their doors to everyone.

All scrapstores have different means of accessing their scrap materials. In some you need to pay an individual membership fee, at others you simply pay for the scrap you take on the day.

Many scrapstores also have shops open to the public selling high quality art and craft materials from glue to paintbrushes to complement the scrap.”

Since we joined our local branch over the Summer we’ve already been several times, picking up scraps of unwanted paper, sticky silver tape, empty sweet jars and numerous other indescribable objects.  As a member we had to pay a £30 yearly individual membership fee which means we can pick up as much Scrapstore bits and pieces as we want.  There are Scrapstores all over the country, and you never know quite what you are going to find, but with a bit of imagination you can create some amazing things.  

Scrapstore Finds

Our local one always has loads of unwanted childrens toys and books, I particularly love the books as they are often ones I remember from my childhood.  Inside the Scrapstore there is also a Community Repaint Scheme and a Furniture Project.

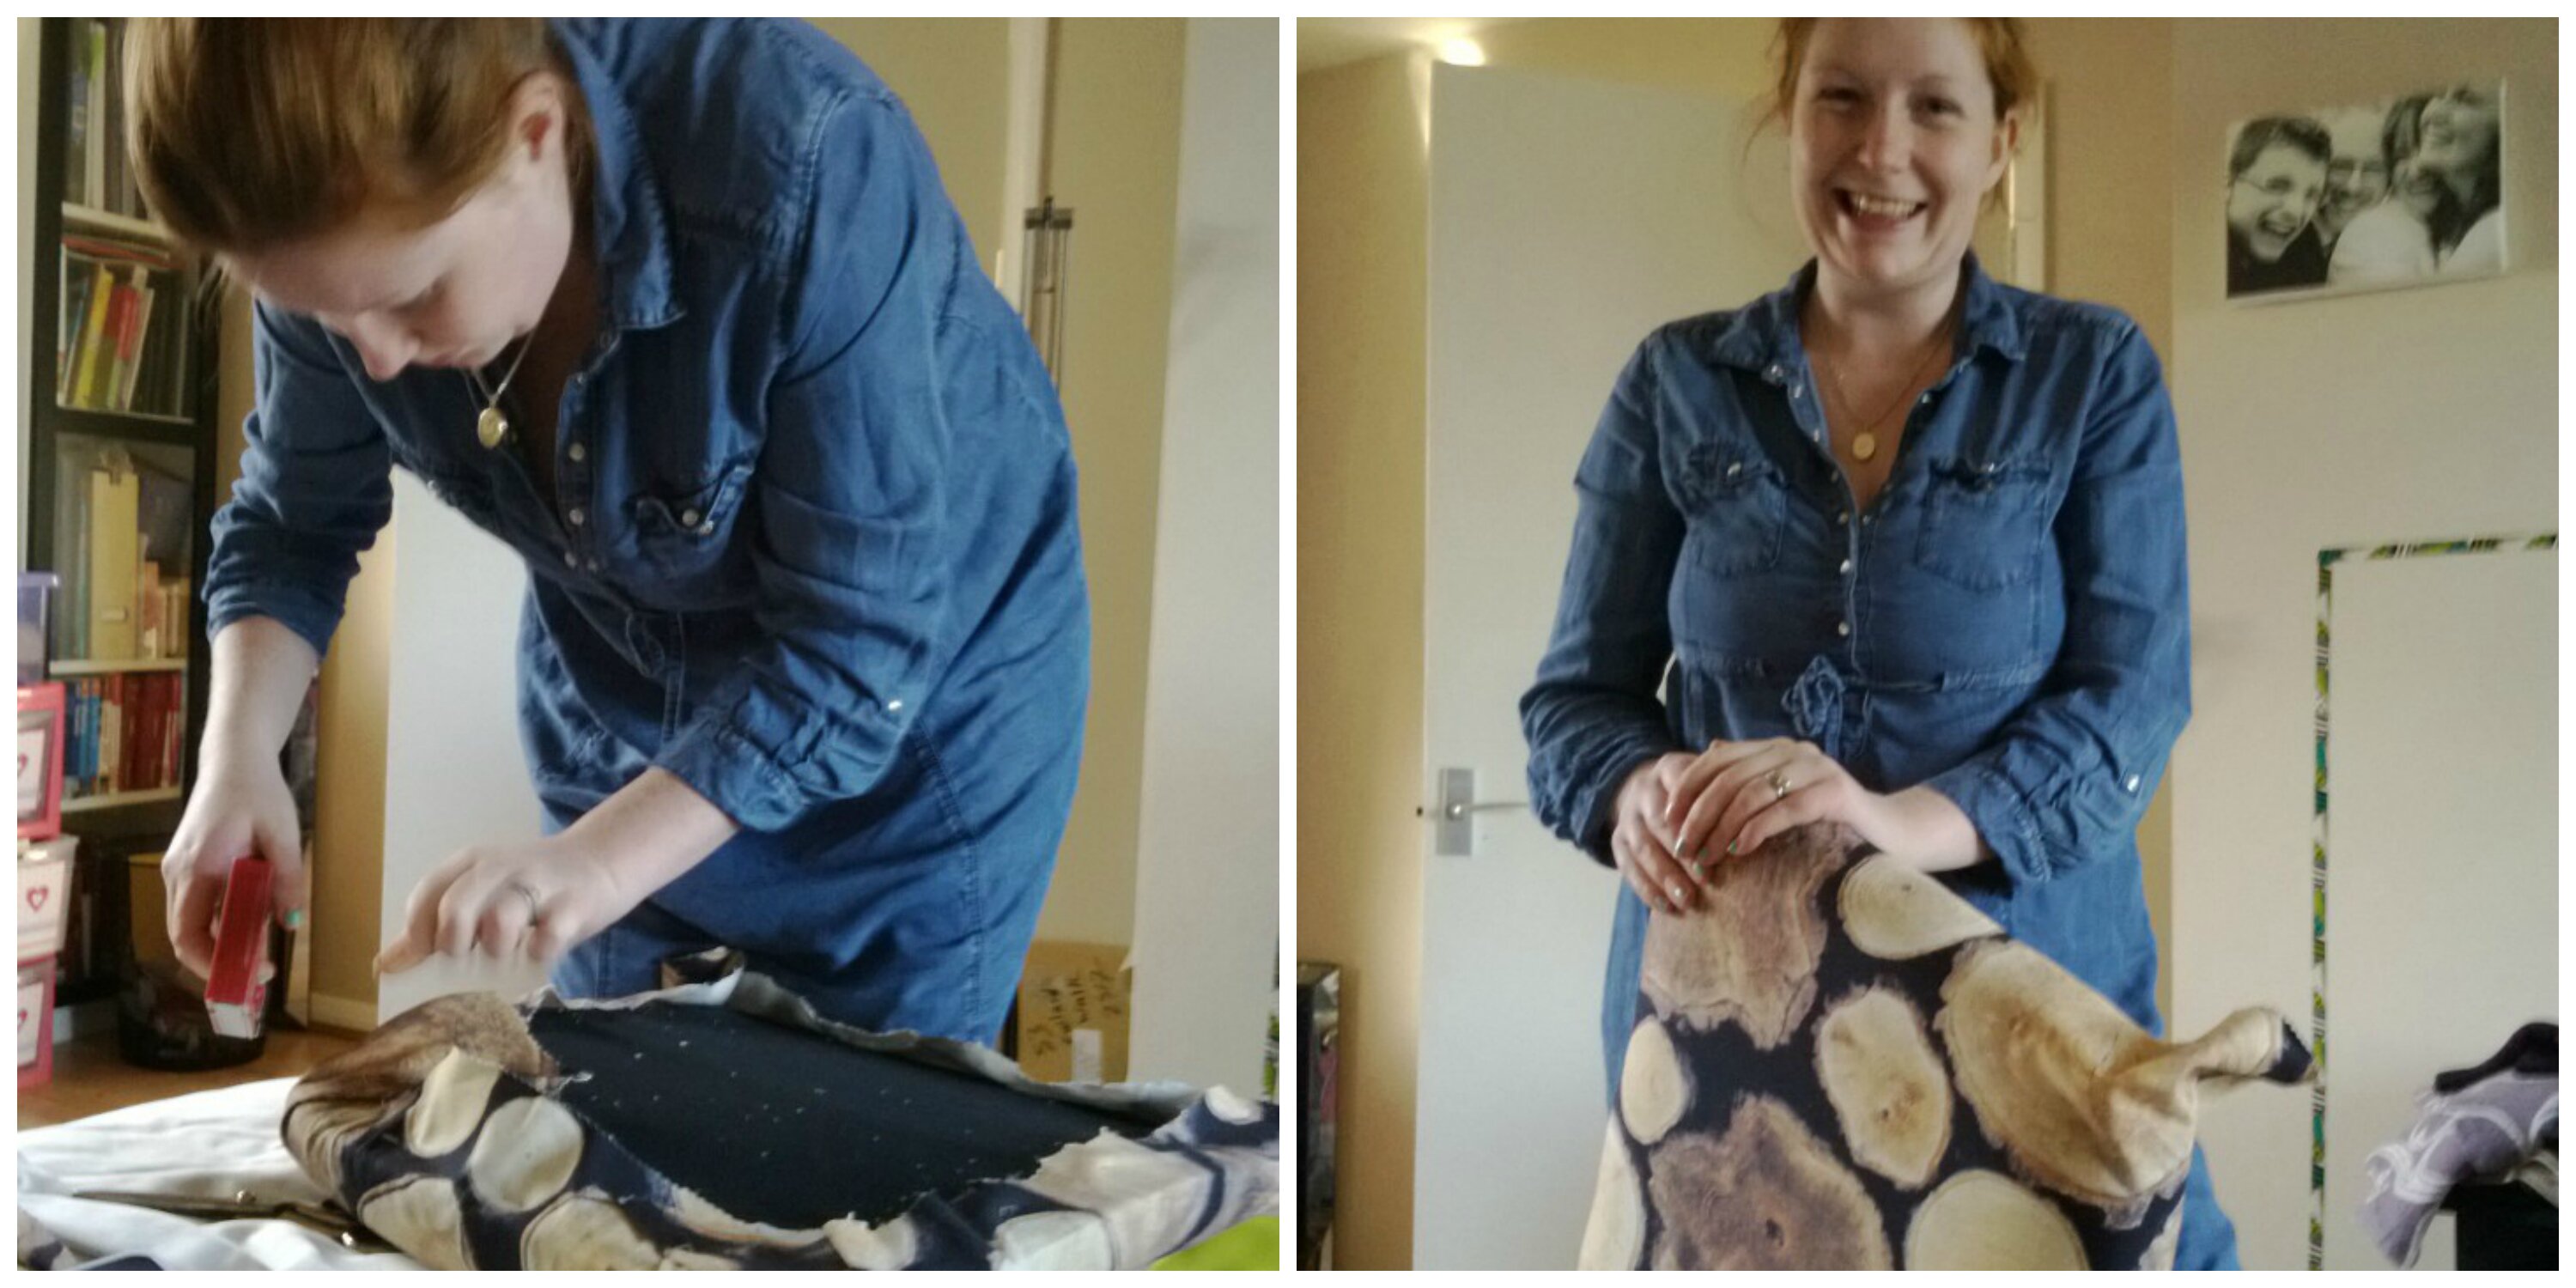
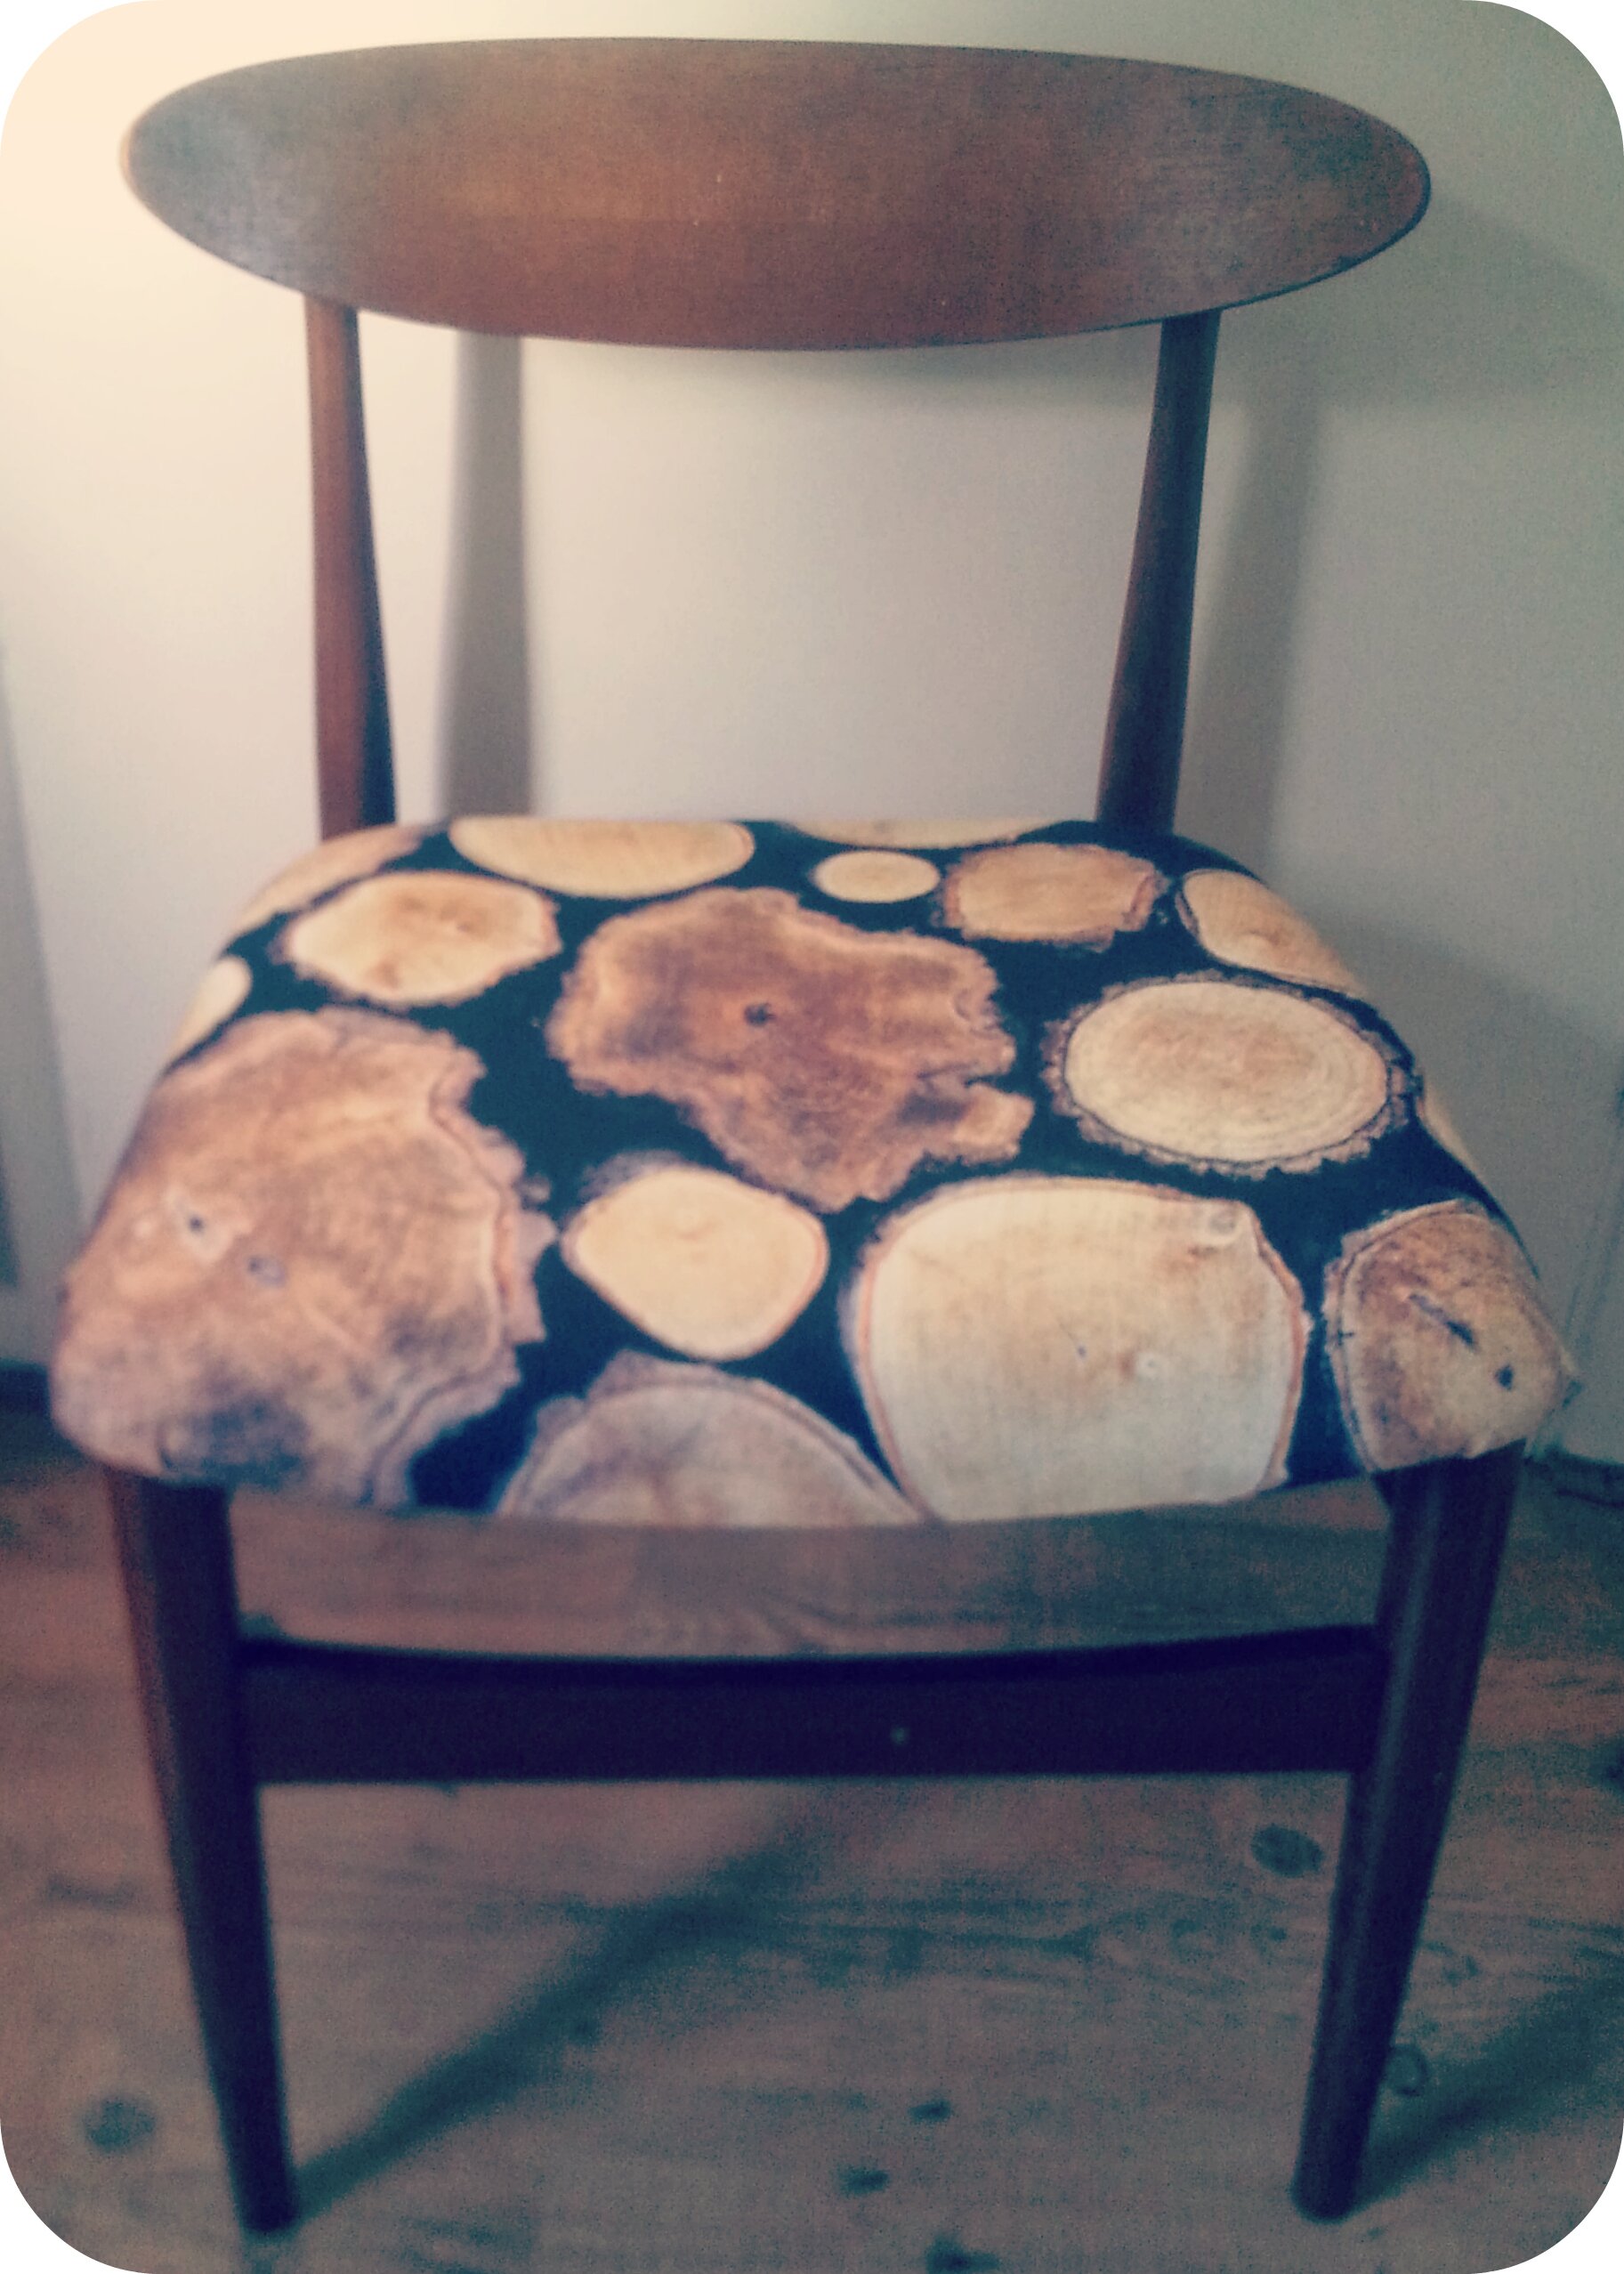
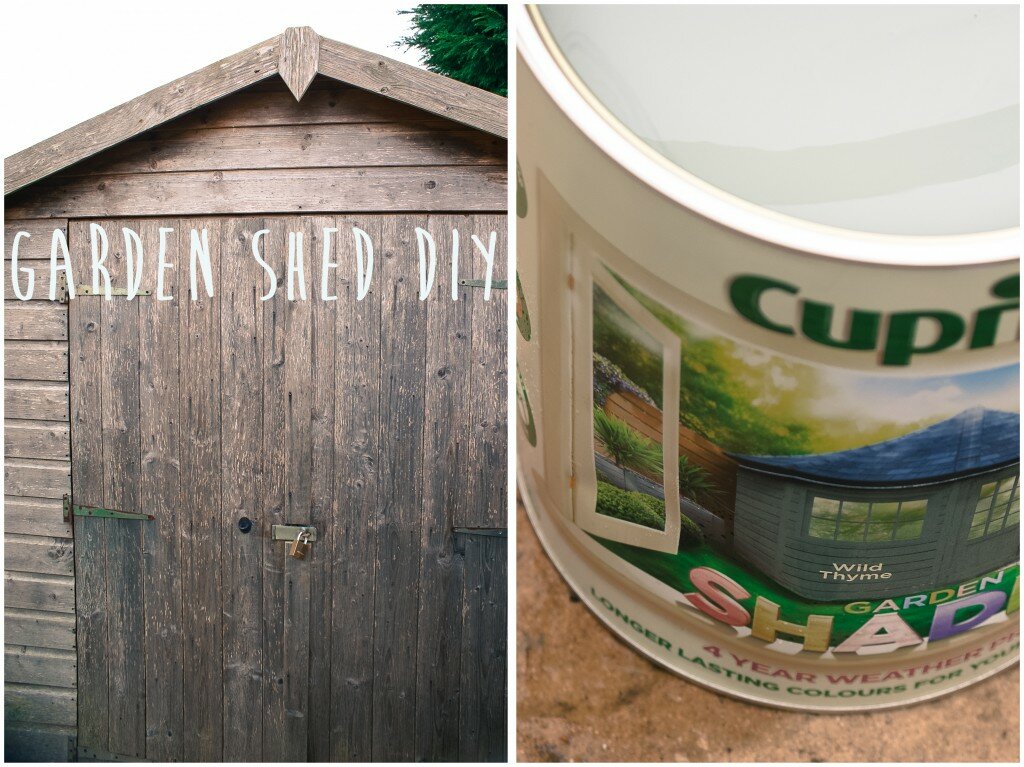
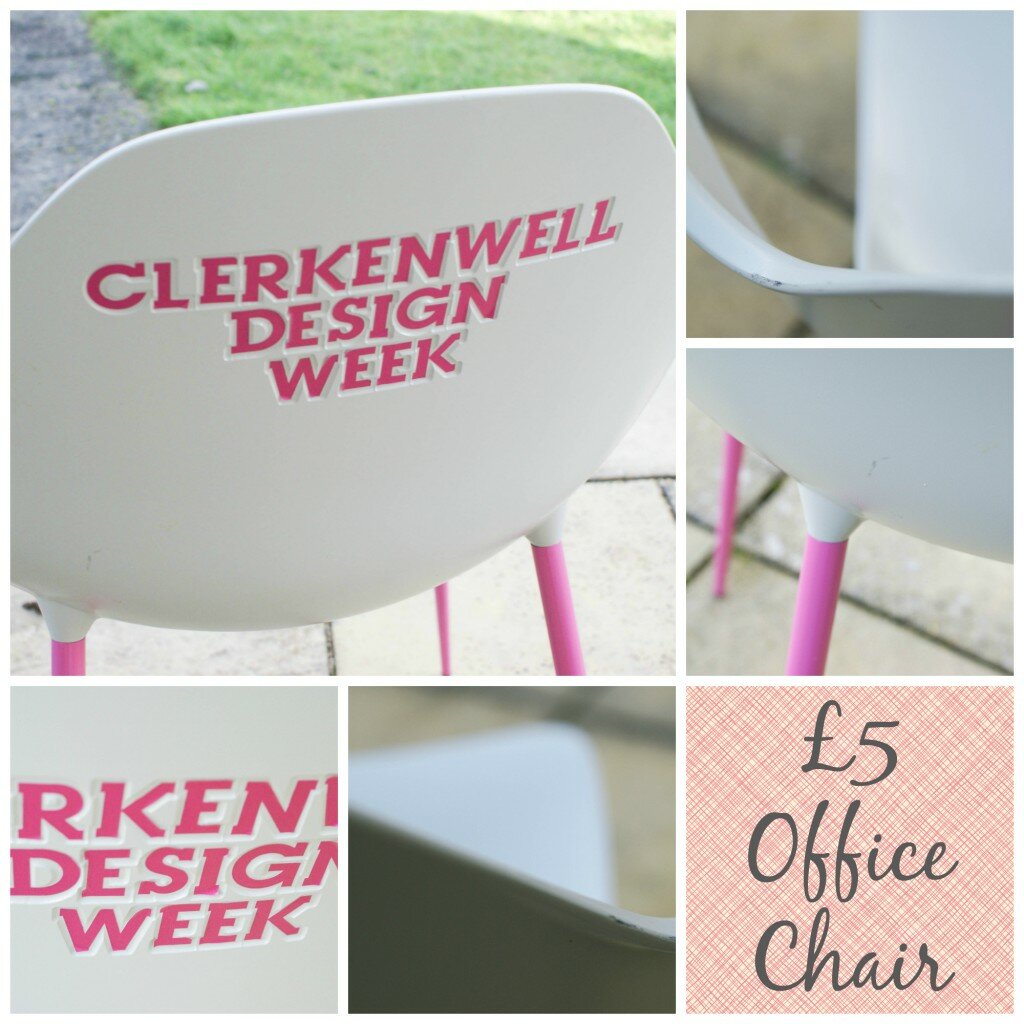
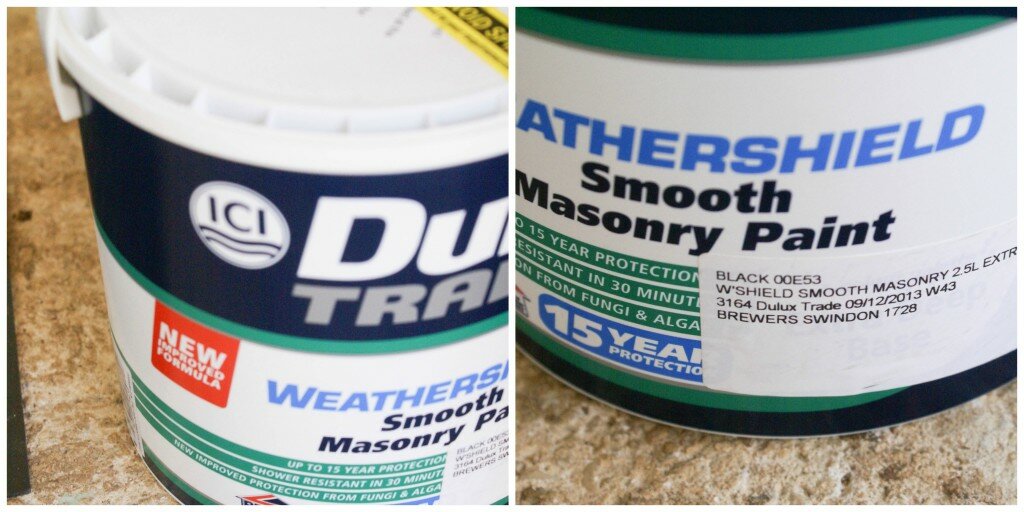
Last week I picked up a small car mat, which you can see in the top picture.  Nye has really enjoyed playing with it since I brought it home and I can see him using it for years.  And, as soon as he outgrows it I know I can give it away for another child to make use of.  The other two items I’ve shown below I purchased, but I think you’ll agree that £5 for this stylish chair and £2.50 for two and half litres of unused and unopened masonry paint is a pretty good deal!

paint. Collage

There are scrapstores all over the country and you can find your nearest one on the Reuseful website.

How To Re-cover Dining Chairs

January 3, 2014 by Jenni Clutten | 21 Comments

recovering dining chairsHello and Happy New Year to you! It’s 2014 and I’ve already written my first to do list and on my list I wrote recover dining chairs (FINALLY).  I blogged about how we had bought a mid century dining table set on ebay way back in November and I’ve been wanting to do it ever since.

I’ve continued to search for the right fabric to recover the chairs.  I initially wanted to use a family friendly vinyl and I bought some really cheap black stuff (£2.99 x M) I spotted in Dunelm Mill as a trial run.  Unfortunately, when I got the vinyl home I really hated the shiny look and this made me feel very uneasy about spending much more than a few pounds on fabric to cover the seats.  However, they really did need recovering urgently as, in addition to being threadbare, they were now covered in sticky Nye hand prints of varying colours and textures.

Over Christmas as we were tidying I found some wood patterned fabric I bought from Ikea to use in our old kitchen.  It dawned on me that I had enough fabric to cover the four chairs and I thought it would look kitchy used on these old chairs.  Especially when we get the lovely Marimekko wallpaper up and try to create a mid century look.

DIY.chair.collage

 Here’s my How To Re-cover Dining Chairs Tutorial.

What You Need:
Fabric (Enough to cover the cushion covers and preferably in a thick and durable fabric.)
Fabric Scissors
Staple Gun
Staples
Hammer

Instructions:
1.Remove the seat pad from the chair (ours lifted off easily, you may have to unscrew it or lever it out.)
2. Lay out your fabric, upside down, and place your seat pad on top.
3. Turn the pad over to check you are happy with how the pattern is aligned. (Think about whether you want the pattern centered for example)
4. If you are happy with how the pattern looks, cut out your fabric to fit the seat pad. I gave myself quite a bit of extra fabric on each side to allow for mistakes.
5. Use the staple gun to attach fabric to the chair. Start by securing the centre of each side, pulling the fabric as tight as you can .
6. Work your way along the sides from the center, leaving the corners until last.

7. Pleat the corners by pulling the corner of the fabric diagonally towards to center of the seat base. 
8.  Next fold one side of the corner down so that the edge runs diagonal, then fold the other side down and staple.
9. Once all corners are complete, trim off any excess material and hammer down any staples that haven’t gone into the seat base completely.
10. Return seat pad to chair and secure.
11. (optional) You may want to use some kind of stain guard to protect the fabric.  (I haven’t done this yet but I’m interested to see if it helps keep the material clean.)

How To Recover Dining Chairs Continue Reading →

Garden Shed Renovation

October 21, 2013 by Jenni Clutten | 2 Comments

Garden Shed Renovation

Sorry for the rather extended absence over here.  As I have mentioned incessantly, we have been moving house.  But, although we have been reacquainting ourselves with moving boxes and packing tape this week, we are at least now emptying them and folding up the boxes ready to be recycled.

Believe it or not, it is now less than 5 weeks until my due date and it would be accurate to say that moving house has spurred me into the nesting stage perhaps slightly before I should be there.  I started by designing the nursery which I have now started painting.  Once I have a chance to paint the other walls I shall show it off to you all.

Last week the rain paused for a brief moment and I took the opportunity to make a  start with our garden shed renovation project.  There really are not enough hours in the day to get all my plans done, so I can only try my best to zoom around while Nye is napping.

Garden Sheds

Our new house is very well endowed in the shed department, we have two.  So, as soon we put the offer in on the house I was plotting out how we might use the larger shed as a lovely office and craft space for us to escape to.  Both of our shed are to the side of the garden as you can see in the picture above.  The shed I’ve been painting is the one behind the greenhouse that you can only just see.

Budget Breakdown so far:

Garden Shed Painting

Sources

I didn’t have any idea how much paint we would need so I bought the 5L tin just in case.  As it happens, I think one 2.5L tin would have been enough for the shed but I will also be painting our other smaller shed in the same colour and probably our garden gate.  I’m also using the paint brushes in the nursery so I decided investing in some nice ones would be a good idea.

Shed Before Collage.2

Shed During Collage

So far I’m really pleased with the progress, even after just one coat.    Editing the photos to post this has reminded me of the tatty state the shed used to be in and already just with one coat on it looks much better.  It is quite amazing how quickly you forget how things looked before which is one of the things I love about blogging as it allows you to remember how things were and appreciate all the hard work you put in.

That’s it for this week, let’s hope for a little more dry weather so I can get the second coat on.  Then next we are on to the insulation so we can hopefully use the shed in summer and winter.  As usual here’s my of inspiration.

Have you done any garden shed renovation?  Got any tips?

Creating a peaceful nursery – stylish sunday

September 29, 2013 by Jenni Clutten | 2 Comments

Our house buying is almost complete and now it is time to think about creating a peaceful nursery for our new arrival.

I love vibrant colours, which is why I painted the nursery in our last house a wonderful bright yellow.  This time around, with one child already and my due date looming in November, I’m seeking out a more peaceful vibe to try and calm my new baby nerves.  I love the idea of white walls but I actually think they can sometimes feel a bit stark and bright, by adding a little colour this should help soften up the room.

Taking Inspiration:
I was inspired by some other nurseries I noticed on this morning so I’ve made a collection of my favourite UK paint samples and style ideas on the polyvore board below.  I’ve also included the vinyl decals I bought this afternoon on ebay which I’ll be adding to the turquoise wall to give it a more fun look.  I used quite  a large vinyl decal of a tree in Nye’s old room and have heard good things about smaller ones so I’m looking forward to give it a go.  Although I love wallpaper, the cost of it soon adds up, even in a small room so I’m hoping these clouds will be a good alternative. (I’ve got to admit, I fell in love with them a little bit here.)

mint moodboard inspiration

Then once I had chosen my colour and feel I decided to put together a few of the items we already own with a few new things too.  I bought the amazing felt lampshade from Modernbaby in the sale for £6.  I probably do have a spare shade nocking around but I thought this one was too cute to pass up.  The cot bed is just an example though (although a very reasonable £99 from John Lewis) as we are reusing Nye’s old cotbed which we sourced via freecycle.

Peaceful Nursery

Selecting complementing products
I really think the nursery above has a traditional yet modern feel.  The mint colour could easily look babyish but I think the use of monochrome really makes it feel a bit more unique.  I know it’s quite blue-ish but I actually see it as a really girly room.  That said, I still think it would look awesome for a baby boy.
Creating a sense of peace
Thinking back to when Nye was a newborn we were very lucky to be sent some amazing gifts and I was particularly grateful for a fantastic room fragrance.  It really helped me to enjoy those evening feeds.  I have no idea if it helped Nye to have any kind of understanding of night time but I enjoyed it, and as they say, contented mum means contented baby!

Getting the right lighting can also be helpful when creating a peaceful nursery.  I recently took a punt on a Cloud B Tranquil Turtle which I found in the Zulily sale for £20 which we love. (Zulily only sell items for limited periods so I have linked to the amazon listing)  The turtle acts as a fantastic nightlight and gives out a mesmerising blue wave effect that moves like waves across the walls and ceiling.  There are loads of settings, moving waves or static as well as two different sound affects, waves and waves with calming music.  It’s a great addition to any room and I think Neil is debating getting one for our bedroom we find it so relaxing.  So, for setting a bed time routine for a baby I think this will be awesome.

DISCLOSURE
This is not a sponsored post, I have selected all the items in the post myself and purchased, love and use many of them already.

DIY Children’s Tent – UK Version

June 27, 2013 by Jenni Clutten | 0 comments

Nye is now 18 months old, and I have been wanting to find some more creative activities that will provide opportunities for imaginative play.  Den’s are an excellent example of toys that can be used for multiple purposes, inside and outside and will last and be enjoyed for years.  I still remember being addicted to making dens in our house as a child so this months Center Parcs June Challenge was the perfect push I needed to create our very own DIY Children’s Tent.

DIY Children's TentI remembered immediately that I had pinned a DIY A Frame Tent on some time ago and sought immediately to track it down on one of my numerous boards.  I eventually found it, wrote down all the measurements and headed out to look for some suitable material in local charity shop and DIY store.  However, it soon became apparent that I wouldn’t be able to find the exact measurements as the widths of wood in the UK are different to America (mm here and inches there.)

So, with that in mind I thought it might be helpful to share the measurements I used so that the DIY is a little easier for people this side of the pond.  I also took the advice of  Rubyellen who suggests that you could use a single bed cover instead of fabric.  For me this meant the cover was double sided (fishes on the inside and out) and also that I did not have to hem the fabric. (Hurrah) I was also feeling extra cheeky as I had no elastic to sew to the cover and managed to clip the edges of the fabric to the frame using elastic bands and string.  But, having used this for a few days, I think sewing on the elastic will mean I don’t have to keep tying the edges down every 24 hours.

YOU WILL NEED

For the Tent Cover

  • 1 x single duvet cover (135mm x 200m) – you could also use fabric cut to any size you would like and just alter the length of the wood to accommodate.
  • 1 meter of elastic
  • Scissors
  • 4 x Elastic Bands

For The Frame

  • 2 x 18 x44mm x 2.4m
  • 1 x 18mm x 2.4 dowel rod
  • Drill
  • 18mm or 19mm flat wood drill bit (I used 19mm because that’s the closest we had to 18mm)
  • Hand saw
  • Tape Measure
  • Pencil
  • String

First of all I must say the instructions on the original A-Frame blog post are really clear and include pictures that are incredibly helpful.  I am going to write a quick run down of what I did, just because I did make a few alterations to try and make the whole process a bit quicker.  But if you get stuck, please click on the link and the photos there will help you!

  1. Start by using the hand saw to cut the 2 x 2.4m wood lengths in half.  Once this is done you will have 4 x 1.2m lengths which will make the A frame.
  2. Next use a hand saw to cut the circular dowel that creates the top of the tent.  I cut mine to 147cm.
    I calculated this length by using the width of the fabric (135cm) and then adding 6cm on to each end (135 + 6 + 6) = 147cm.  This then allows for the a frame to be added on to the end with a little room keep it all together.
  3. We then measured up to drill the holes in the 4 x A frame.  To do this I used a tape measure to mark 15cm down from the top of each leg the marked a cross in the centre of the wood (22mm) which showed where the drill bit needed to go.
  4. Once each leg was measured up we used a 19mm drill bit to create a hole for the top dowel of the tent to be inserted.
  5. Next I inserted the dowel into the four holes to create the basic frame of the tent and stood it up ready for its finishing touches.
  6. Once the frame has been created you can then hang the fabric over it and line up the legs at each end.
  7. As I was unable to find a 18mm drill bit and used a 19mm one instead,  I then used some string to secure the legs into place.
  8. Finally once I was happy with how the cover was hanging, I used an elastic band on the bottom of each leg to secure the four corners of the fabric.  For good measure I then tied some string around to keep them as tight as possible. (You could sew some elastic directly on to the fabric to make for a more hard wearing tent)
  9. Enjoy your new DIY Children’s Tent by adding some cushions and blankets!

I am writing this post in my capacity as a Center Parcs family blogger.  For a chance to become a Center Parcs Family Blogger and to win a family break to a Center Parcs village of your choice, simply share pictures of your outside hideout on your blog, letting Tots 100 and Center Parcs know that it’s your entry into this month’s challenge. Then just tweet us a link to it – be sure to include the Center Parcs and Tots 100 handles in your tweet, and don’t forget to use the #CPFamilyBreaks hashtag before the challenge closes on June 28th.

This gallery contains 0 photos

May 22, 2013
by Jenni Clutten
0 comments

Stylish Sunday – DIY Fashion Roundup

  1. T-shirt 2. Necklace 3. Pumps 4. Skirt Here are some of my favourite fashion DIY’s that will leave you with a new wardrobe without having to spend a fortune.  To see how to make any of them simply click on the links … Continue reading

April 10, 2013
by Jenni Clutten
1 Comment

The Great British Florist – Review

A few weeks ago I was contacted by The Great British Florist about reviewing some of their lovely flowers. Let’s just say they didn’t need to ask twice and I was excited to be told that some would be sent to … Continue reading

Categories: diy, Florist, lifestyle, review, wedding, weddings | Permalink